Universal Print
Overview
Microsoft’s Universal Print brings cloud printing to Microsoft 365 customers running Windows 10 clients.
The PaperCut Connector enables PaperCut MF or NG to manage all Universal Print jobs. The connector is a complete replacement for the official Microsoft Universal Print Connector. It retains the identities of print job users and forwards the information to PaperCut NG or MF.
The PaperCut connector:
-
registers your local Windows print queues with Universal Print
-
pulls down print jobs from Universal Print and sends them to your local queues
-
monitors printer and job status, and reports back to Universal Print.
Requirements
-
A Windows installation of PaperCut MF or PaperCut NG, version 21.0 or newer.
-
Credentials of a user in your Azure tenant with the Global Administrator role (to complete the setup).
-
Your PaperCut installation must be configured to sync with Azure Active Directory as a user identity source so the connector can pull user information from Azure.
It’s highly recommended you explore Microsoft’s Universal Print documentation to understand how Universal Print works.
Known limitations
-
Printer capabilities vary between manufacturers and versions of printer drivers. Universal Print has unified the many different printer features on the market into a common set. This means advanced printing options like stapling or hole punching might not be available for your model of printer yet.
-
Microsoft enforces a system-wide document size limit of 100 MB.
-
Changing the name of a registered print queueA print queue displays information about documents that are waiting to be printed, such as the printing status, document owner, and number of pages to print. You can use the print queue to view, pause, resume, restart, and cancel print jobs. in Windows will cause the connector to stop functioning correctly.
Set up
When you install PaperCut MF or NG, by default the PaperCut Universal Print Connector for Microsoft is installed as a separate service alongside PaperCut.
-
Enable Universal Print integration.
-
Log in to the PaperCut Admin web interface.
-
Navigate to Enable Printing > Mobile & BYOD.
-
Click the Enable Universal Print integration checkbox.
-
Click Apply at the bottom of the page. The Universal Print tab is added.
-
-
Click the Universal Print tab.
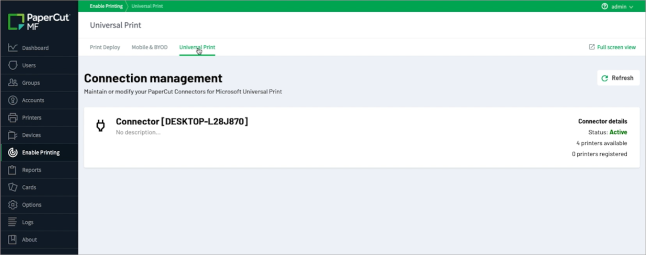
This page shows the connectors that are associated with your PaperCut installation. By default, you’ll only see the connector that is preinstalled on your primary server.
The connector can support multiple “secondary” connectors. This allows you to centrally manage a collection of connectors installed on multiple servers. For more information on secondary connectors, please contact PaperCut support.
Register a printer
Printers must be registered with Universal Print before they can be shared and used.
-
Click Enable Printing > Universal Print to go to the Universal Print connector configuration page.
-
Click the connector running on the print serverA print server is a system responsible for hosting print queues and sharing printer resources to desktops. Users submit print jobs to a print server rather then directly to the printer itself. A print server can be a dedicated server but on many networks this server also performs other tasks, such as file serving that has your printer(s) attached. A list of all printers associated with the connector is displayed.
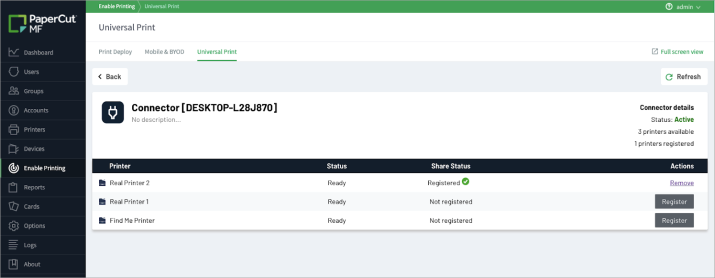
-
Click Register on the printer you want to make available in Universal Print. The Register Printer dialog box is displayed.
-
Follow the instructions online to complete the registration.
During the registration process, you will be redirected to authenticate with Azure using an account with the Global Administrator role. You’ll then give consent to the connector service to register the printer.
After you’ve registered the printer, you’ll need to share it with the users in your organization. Refer to Microsoft’s documentation on printer sharing.